Now then over the past few days I have been sorting out how to present the final project, its going to be a video created with all the best models I have created well on the EPQ, the models will be shown using a turntable animation "This where the model spins 360 degrees as if its on a turntable" this will allow people to see all of my models and each pass will be different, the first pass will be a clay render, the second a wireframe overlay, and finally the third the final textured render heres a example of one of the final passes, heres the Pumpkin model. Also forgive the quality Blogger seems to dull down the quality of videos unless they are on youtube.
Now imagine that with two other spins each with a different style and thats basically the final style my models will be presented in.
Along with still renders before the turntable animation kicks in, in terms of new stuff I have been playing about with HDR or HDRI depending on who you ask basically HDR stands for High Dynamic Range/High Dynamic Range Imaging and its a photography technique which produces pictures that look like this, they have a focus on lights in the scene.
HDR allows a greater focus of the dark and light parts of the scene and the intensity of the light, now then how does this work with 3D? Well 3D artists can use these images to create really interesting things, they can use them to light a scene without using lamps, now I know that sounds dull but it produces some really interesting results it allows for lots of different types of light to be made depending on the kind of HDR image you use, now if you then create an object and makes its material mirror the world it will reflect the HDR image which is being used to create the light and will make the object look like different materials like metal! :D heres an example
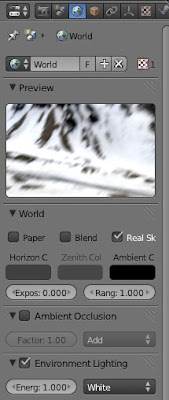
Imported this HDR image into Blender edited the brightness, contrast etc because it was a little dark.
You can see the HDR image there after that its set to display from the camera around the world and then after clicking real sky it maps it correctly.
The same image after real sky has been clicked.
And finally because I was going for a chrome look I created the material to be dark but allow the mirror setting to be high, which gave the end result a softer lighter look
And finally heres the final renders, now when using HDR if you render out straight away you get a lot of noise, "Noise is basically grains on the render, these happen when you render low samples you can see grains around the image not a good thing if you want your render to be high quality" basically to make it more high quality you need to increase the samples of the render sadly this comes with a price, the price being stupidly high render times, here is a selection of a few with different sample sizes, click on them to make them bigger to really tell the difference :D
HDR Metal Chrome Effect Test 1 samples: 8
HDR Metal Chrome Effect Test 2 samples: 10
HDR Metal Chrome Effect Test 3 samples: 12
HDR Metal Chrome Effect Test 1 samples: 16
Remember click the image to see it at full size so you can tell the difference with the last 3 samples even zoomed in they look totally the same, basically because the sample size start getting so high the changes become very small, if you want to see those changes you would have to zoom right into the pictures :D
Till next time.
Sources used:
Simple Animations by Conor Scott is licensed under a Creative Commons Attribution-ShareAlike 3.0 Unported License.


No comments:
Post a Comment