Now as some of you may or may not know, Blender 2.64 released sometime last week and of course I have been having a play around with it, trying the new modifiers like the Skin modifier which allows you to create a fully rigged and modelled model quickly and easy.
Nice new splash screen, its from a scene in the new Blender film called Tears of Steel which I recommend checking out its pretty sweet. In fact I may do a post one time about those films, basically in short the people that make Blender every year I think they announce a project and normally its a short film that anyone can help with and over the years they have made 4 I think and they are pretty good do check them out :)
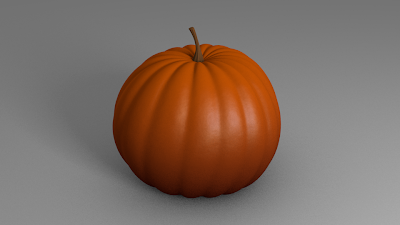
Now then Pumpkins, as you may or may not have seen my last little post, It was of a render of my newest model a pumpkin, now why did I make a Pumpkin well...
1. Its Halloween season
2. Pumpkins are totally the symbol of October
3. Never done a Pumpkin
4. Its quite detailed and would give me good practice
Also pumpkins really do have a weird shape as I found out first hand god dam indents !!!
Anyway the total time to model just the pumpkin most likely took me about 40mins maybe stem and all, the bits which took me the rest of the day was the colouring and the texturing and finally creating the complete patch of pumpkins.
Clay render:
Hands down what with the indent type things in the sides of the pumpkin this is most likely my most detailed model :) now for the next few pictures you made need to look closely to see the dereferences they are they, basically its the texturing pictures and if you look closely at some you can see the overlaying texture, I used a cloud type texture to give the pumpkin that bumpy surface remember just click the picture to zoom in on it.
Texture and Light test 1
Main body of the pumpkin coloured, using the blend colour modifier to blend to colours together notice the light top and darker bottom.
Texture and Light test 2
Had a play around with the colours making the top half a little lighter also adding randomness to the pumpkins shape, as you no not all pumpkins are perfectly round so I played around with its shape by using the Twist deformers.
Texture and Light test 3
Began work on the pumpkins stem colouring it and shading it also begin to create cloud texture for the skin of the pumpkin.
Texture and Light test 4
Stem coloured and shaded and could texture fully added, render complete on a white background.
Final render: For the final render I created a new backdrop for the Pumpkin which is a black scene to give the pumpkin a better contrast in colour with a glossy bottom which slightly reflects the pumpkin.
In the next post I will talk about how I then went onto create a Pumpkin patch :)
Also my Pumpkin has been uploaded to Blendswap basically its a website that 3D artists can upload models to for people to use and download please go to blend swap and if you need a pumpkin please download mine it would mean a lot :)
Till next time.

Simple Animations by Conor Scott is licensed under a Creative Commons Attribution-ShareAlike 3.0 Unported License.


No comments:
Post a Comment